

DPF Cleaning 101: Inspection & Benchmarking
Don’t jump the gun…
There’s more to a successful DPF cleaning than just a high-temp bake or a deep clean.
Your favorite professional race car team, be it NASCAR, NHRA, or F1, all have checklists & procedures to perform before and after every race. Likewise, a proper and effective DPF cleaning process requires thorough inspections and benchmarks before and after.
Why is this so crucial?
- First, it is important to determine if the filter should be cleaned or replaced. Sometimes, DPFs are so damaged or clogged that cleaning them would be a waste of time & money. A replacement filter will need to be purchased (Insert sad music here).
- Second, by measuring the filter’s condition before cleaning, you can compare it to the post-cleaned state. This indicates how effective the cleaning process was.
In a hurry? Jump down to get the quick summary & a video. Also, check out the FAQ.
Step by Step
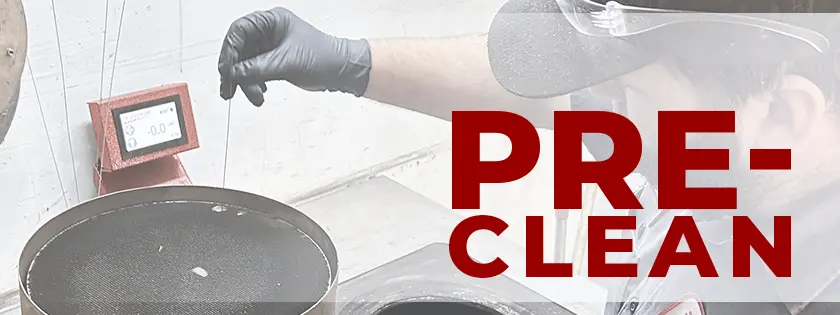
PRE CLEAN:
Before Cleaning Steps – Inspect
- Visually Inspect the filter: Keep an eye out for cracks, holes, or other damage to the filter brick.
- Perform a crack check: Using the Inspection Table, turn on the light and look through the filter from the top. If light shines through, the filter contains cracks or damage to the brick.
- Wire/Pin Test: Perform a wire/pin test next. If the DPF has hardened areas, test around those zones to see how much of the filter is clogged, it may need replacement if the ash compaction is more than 1/3 of the filter.
PRO-Tip: First, Pin test the outlet/clean end, this will provide a good read on the depth of the cells, plus a sense of what a clean cell feels like. Check a few cells then flip the filter over and do a thorough test of the inlet end. We recommend using a star pattern across the face of the filter.
- Heat Damage? Examine the DPF for signs of high heat damage such as melting or scorching. If the DPF has had an extreme heat event, it is likely harmed beyond repair. Melting in the brick can also be discovered if the pin won’t go down all the way into a distinct area of cells.
- Dirty Outlet? Check the outlet side of the DPF for soot. This indicates that the DPF is compromised and should be replaced. One rule of thumb is “If it’s smokin’ it’s broken”
- Fluids Present? Check the filter for the presence of engine fluids such as oil, fuel, or coolant. This signals that there’s an upstream issue that should be fixed. If not, the aftertreatment system will continue to have issues, or worse, sustain expensive damage.
PRO-Tip: Create a unique identifier or number for each filter & write it on the filter with a paint marker to help keep things organized. This is especially important for shops that clean a lot of filters.
Before Cleaning Steps – Benchmarking
- Measure the “before cleaning” weight & airflow for comparison later.
- Document the weight & airflow readings (using FilterTrak or a comparable system)
- Take good pictures of the filter (save in FilterTrak or a comparable system)
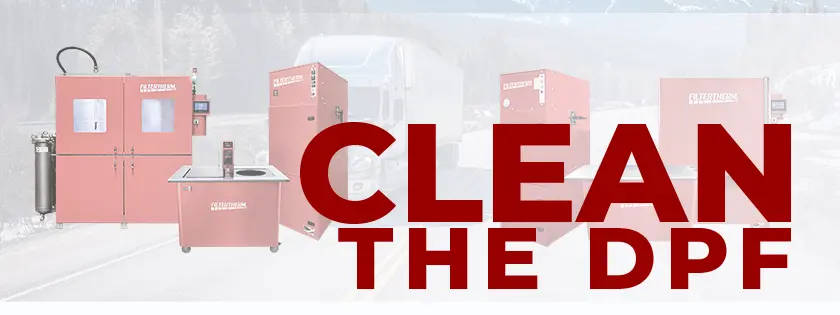
CLEAN THE DPF:
Clean the filter using your preferred process – in most cases, this will be either the Thermal or Aqueous procedures.
PRO-Tip: Thermal Cleaning: For obvious safety reasons, be sure the filter has adequately cooled down before conducting inspections & benchmarking. The Filtertherm Cool Down Cart can significantly speed up the cooling time.
PRO-Tip: Aqueous Cleaning: Completely dry the filter with the Filtertherm Dry-Out Cabinet created for this very purpose (drying time is generally around 45 minutes).
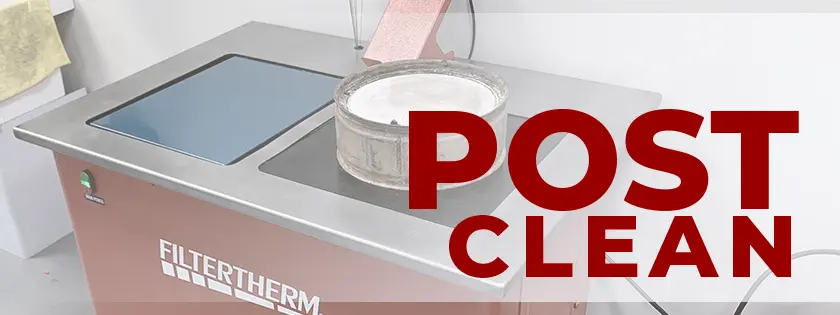
POST CLEANING:
After Cleaning Steps – Inspection
Visual Inspection: Again, check for cracks, holes, or other damage to the filter brick that may have been missed the first time.
Wire/Pin Test: Perform a wire/pin test post-cleaning. Check using a star pattern across the inlet face. If the DPF is still showing signs of ash or seems to have some stubborn areas, it may need a second cleaning. If that does not work, a replacement may be necessary.
Fluids Present? If upstream engine fluids are still present at this time, the filter may be beyond repair.
PRO-Tip – The Tap Test: After cleaning, give the DPF a “tap test.” Place the filter inlet-side down on a clean surface and gently tap it. Ideally, only a light dusting of light-colored ash should fall out.
If you see a significant amount of ash, black chunks, or debris resembling pencil leads, the cleaning wasn’t thorough enough. In that case, the DPF will need to be re-cleaned.
After Cleaning Steps – Benchmarking:
Establish the “post-clean” weight & airflow. Compare those numbers to the pre-clean data.Generally, the filter weight should decrease by around 50 grams after cleaning, indicating successful ash removal. Additionally, the airflow through the filter should show improvement.
However, if only one of these factors changes, it could signal a problem:
- Weight reduction without improved airflow: This could indicate incomplete cleaning, with some ash still trapped inside.
- Improved airflow without weight reduction: This might suggest a small crack in the filter allowing ash to escape but restricting airflow.
In either case, further investigation or re-cleaning may be necessary.
Document the weight & flow numbers (using FilterTrak or a comparable system)
Take pictures of the filter (save in FilterTrak or a comparable system).
The DPF Cleaning Toolbox:
Our experience cleaning countless DPFs over the years has fueled our commitment to optimizing the process. We weren’t initially in the DPF cleaning equipment business, but as the saying goes, ‘necessity is the mother of invention.’
We’ve constantly challenged ourselves: ‘How can we make DPF cleaning better, safer, and faster?’
Benefit from our years of innovation and refinement. These “tools” were designed & developed to streamline DPF cleaning, saving you time and effort while prioritizing safety.
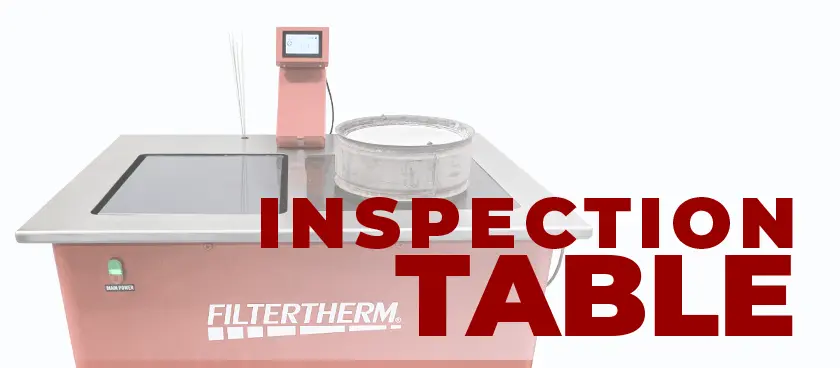
The Inspection Table:
One big answer to that question is the Filtertherm Inspection Table – a machine designed precisely for the Pre/Post stages of industrial DPF cleaning. It’s the only piece of equipment that is incorporated into both the Thermal and Aqueous systems. What makes it powerful is the compact footprint combined with its numerous functions.
- Tough & Compact: Constructed with industrial-grade powder-coated steel & a heavy-duty stainless steel tabletop. A “slim” shop footprint measuring just: 48” W x 36” D x 36” H
- Ergonomic & Portable: The tabletop height is the same as the Filtertherm Oven (& our other machines) for easier transfer of bulky/heavy filters. The unit has heavy-duty, lockable caster wheels for easy movement between stations.
- Multifunctional & Automated:
- The left station of the table features an auto-calibrating scale.
- The right station includes the flow chamber with a calibration plate for easy flow calibration.
- The right side also has a bright built-in light that shines upward for crack detection.
- Convenience features: Device shelf/USB charging port, pin storage, and a bright, touchscreen user interface.
- Flexibility: You can inspect multiple sizes and shaped filters with the included (and add-on) adapter kits.
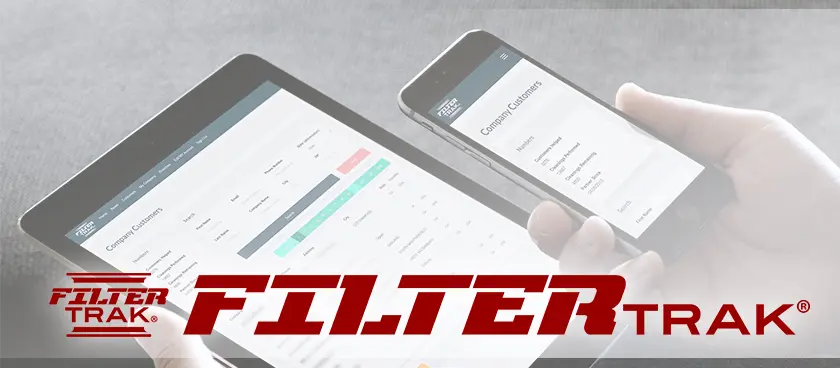
FilterTrak:
FilterTrak – Streamline your DPF cleaning operation with FilterTrak, a custom-built software solution. This user-friendly web app helps you:
- Record and track all your DPF cleaning data: Eliminate the hassle of paper records and simplify data organization.
- Store before & after cleaning photos: Visually document cleaning progress and effectiveness for each DPF.
- Track DPF cleanings over time: Gain valuable insights into cleaning history and filter performance.
- Generate professional reports: Easily create reports to share with customers or analyze cleaning trends.
FilterTrak offers a secure and convenient solution, accessible on both desktop and mobile devices. Say goodbye to lost paperwork and cumbersome spreadsheets that require constant manual updates.
Bonus! Get a free one-year subscription* to FilterTrak with the purchase of any DPF Cleaning package (*$1,200 value).
Boots on the Ground:
Experienced & Trained DPF Cleaning Techs:
Even with advanced tools & technologies, the human element remains irreplaceable in DPF cleaning. Skilled technicians are essential throughout the process:
- Safe & efficient filter removal from vehicles.
- Meticulous inspection to identify potential issues.
- Applying critical thinking & problem-solving skills during cleaning.
Testimonial:
“The uniform table height across all Filtertherm equipment makes a big difference,” says Jerryd, one of our DPF cleaning technicians. “Transferring and maneuvering heavy filters is now much easier and safer.”
He also appreciates the built-in light feature, finding it “invaluable” for detecting cracks in DPFs.

Proper training, adherence to safety protocols, and the use of appropriate PPE are all paramount. Our commitment to technician development ensures a successful and safe DPF cleaning experience.
In Conclusion:
This guide has covered the critical role of pre/post-cleaning inspections/benchmarking in the DPF cleaning process. We’ve outlined the tasks involved at each stage and the essential data to collect for optimal results. We’ve introduced purpose-built tools like the Filtertherm Inspection Table and FilterTrak software, for a streamlined & efficient DPF cleaning process.
These tools & techniques complement both Thermal and Aqueous cleaning methods, providing significant advantages for DPF cleaning businesses.
Guide Highlights:
Filter Integrity Check: Before proceeding, ensure the filter isn’t cracked or compromised. Damaged filters might require replacement.
Pre-Cleaning Inspection & Benchmarking:
- Weight: Measure the DPF’s weight to establish a baseline.
- Flow Rate: Test the filter’s airflow rate to assess initial performance.
Cleaning the DPF: Choose either Thermal or Aqueous cleaning based on your needs and the filter’s condition.
Post-Cleaning Inspection & Benchmarking:
- Weight: Weigh the DPF again to see how much ash was removed.
- Flow Rate: Retest the airflow rate to measure cleaning effectiveness.
- Visual Inspection: Look for any remaining blockages or damage.
Record Keeping: Use software like FilterTrak to record all data (weight readings, flow rates, photos) for each DPF cleaning. This is crucial for managing busy DPF cleaning operations.
For visual learners, feel free to watch this Inspection Table overview video! See a quick walk-through of how to inspect DPFs using the Filtertherm Inspection Table.
DPF Inspection & Benchmark – FAQ
Q: What is the first thing I should do before cleaning a DPF?
A: Before you begin the cleaning process, a full inspection is the most important first step. This helps determine if the filter is actually a good candidate for cleaning. If a DPF is too damaged, attempting to clean it would be a waste of time and money, as it will need to be replaced.
Q: Why is benchmarking a DPF so important?
A: Benchmarking is key because it provides a baseline to measure the effectiveness of the cleaning. By measuring the filter’s weight and airflow before cleaning, you can compare these metrics to the results after cleaning. This comparison is the only reliable way to know if the cleaning was successful.
Q: What are the essential inspection steps to perform before cleaning?
A: The key “before cleaning” inspection steps are:
- Visual Inspection: Look for any obvious external damage, like cracks or holes in the filter brick.
- Crack Check: Use a light table to check if any light shines through the filter. Light indicates a crack, and the filter should not be cleaned.
- Wire/Pin Test: This test helps find hardened, compacted areas of ash. If more than one-third of the filter is compacted, it likely needs to be replaced.
Q: What are the key benchmarking steps to perform before cleaning?
A: The essential “before cleaning” benchmarking steps are:
- Weigh the filter: Document its starting weight.
- Measure airflow: Record the initial airflow to see how clogged it is.
- Take Pictures: Capture “before” photos to document the filter’s initial condition for your records and for the customer.
Q: What parts of the DPF should I inspect after it has been cleaned?
A: After cleaning, repeat some of the initial steps. Perform another visual inspection and a wire/pin test to ensure no stubborn ash remains. You should also check for any signs of upstream engine fluids, which could mean the filter is beyond repair. Finally, give the filter a shake; a small amount of light-colored ash is okay, but if black chunks or a lot of debris come out, it needs to be cleaned again.
Q: How do I benchmark the DPF after cleaning to check the results?
A: To benchmark after cleaning, you will re-measure and compare the results to your “before” numbers. The filter’s weight should have decreased by approximately 50 grams, and the airflow measurement should show a significant improvement.
Q: What does it mean if my “after-cleaning” benchmark results are not what I expected?
A: Unexpected results can point to specific problems. For example, if the filter’s weight was reduced but the airflow didn’t improve, it could mean the cleaning was incomplete. Conversely, if the airflow improved but the weight did not decrease, it might indicate a small, previously unnoticed crack in the filter.
Redline Emissions Products is the industry leader in simplifying the diesel emission system. We are thrilled to have Filtertherm DPF Cleaning Equipment available to our customers & distributors. Filtertherm is an industry leader in designing & manufacturing US-made industrial DPF Cleaning systems.
DPF Cleaning can be a great addition to your heavy-duty truck parts & service business. Check out our ROI tool to run some numbers for yourself.
Browse our website to learn more about our extensive range of aftertreatment products, equipment, & services. And don’t forget our Cross Reference Tool for looking up emissions parts.
For inquiries or more information on our aftertreatment parts, DFP Cleaning equipment, or how to become an authorized REP distributor, feel free to contact us. We are here to assist you and provide the support you need every step of the way.

Want to find out more about becoming a Redline Emissions Products® dealer? Call 888-295-4670 and get in touch with our team. We are happy to answer your questions.
Need Tech Support or need help troubleshooting a DPF problem? Contact REP Support at 1-888-564-4209
Like this content? Be sure to like and follow our social media pages. Message us and we’ll return the favor!


